Easy Juicy Roasted Chicken: Your Guide to a Perfect Dinner
There are few culinary delights as universally comforting and impressive as a perfectly roasted chicken. Imagine: golden, crispy skin giving way to succulent, tender meat, dripping with savory juices. It’s a dish that evokes memories of home-cooked meals and special occasions, yet the secret to achieving this masterpiece is surprisingly simple. Whether you’re a seasoned home cook or just starting your culinary journey, mastering the art of a mastering whole roasted chicken is well within reach, promising a show-stopping dinner with minimal fuss. Our guide will walk you through creating an easy, juicy roasted chicken that’s full of flavor and sure to become a family favorite.
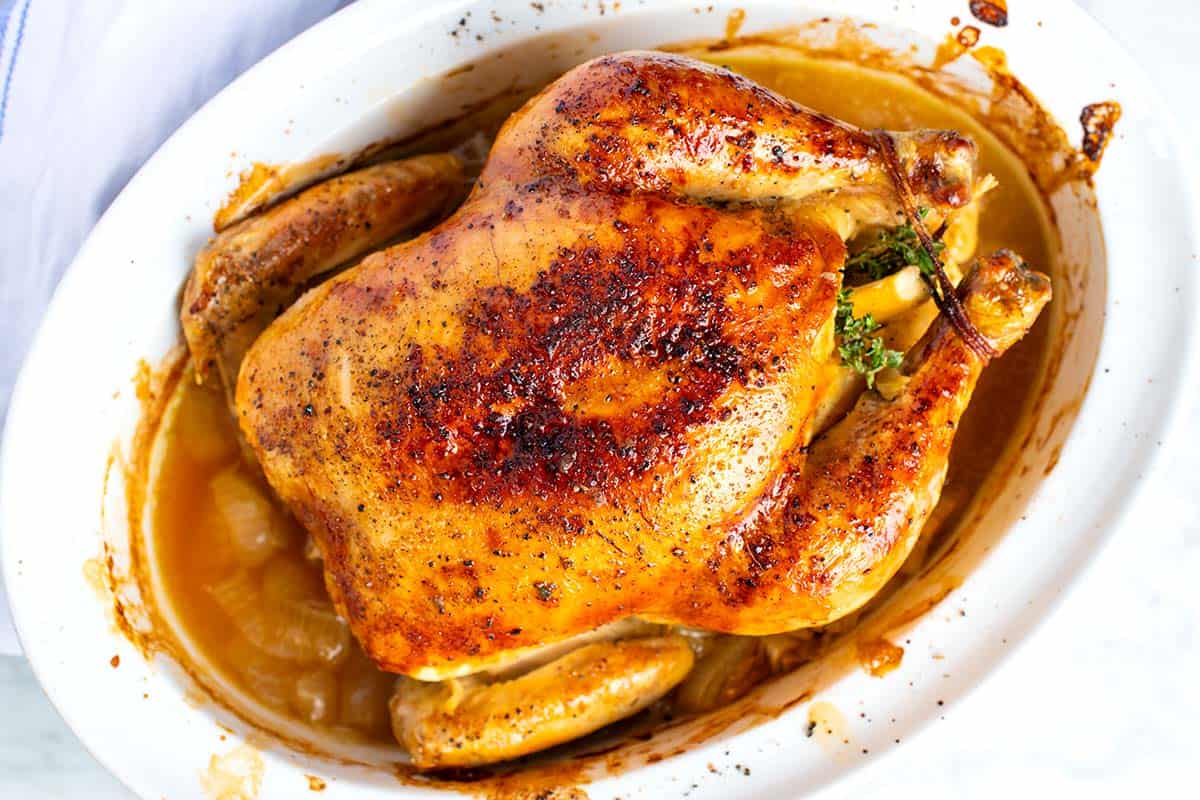
The Secret to Unforgettable Juicy Roasted Chicken
The quest for a truly juicy roasted chicken often seems daunting, but it hinges on a few fundamental principles that lock in moisture and maximize flavor. The methods passed down through generations, like those cherished by grandmothers, focus on simple, quality ingredients and smart cooking techniques. The key is to create an environment where the chicken cooks evenly, its natural juices are preserved, and the skin transforms into a crisp, flavorful crust.
One of the core components to achieving this juiciness lies in the strategic use of fat and aromatic vegetables. Butter, expertly applied, not only enhances the flavor profile but also acts as a barrier, sealing in moisture. Meanwhile, humble celery, often overlooked, plays a crucial role when stuffed into the chicken's cavity. As it heats, the celery releases subtle vegetal notes and additional moisture, subtly basting the chicken from the inside out and contributing to an incredibly tender result.
Essential Ingredients for Your Perfect Roasted Chicken
The beauty of a classic roasted chicken lies in its simplicity. You don't need a lengthy list of exotic ingredients to create something extraordinary. What you do need are fresh, high-quality components and a willingness to let their natural flavors shine.
- The Chicken: Start with a whole chicken, ideally around 3 pounds. This size is manageable and typically cooks within a reasonable timeframe. If your bird is larger or smaller, remember to adjust your cooking time accordingly – a good rule of thumb is roughly 20 minutes per pound, plus an extra 15-20 minutes, though temperature is the ultimate indicator.
- Seasonings: Less is often more. A simple yet powerful trio of good quality salt, freshly ground black pepper, and a touch of onion powder forms the foundation of a flavorful crust. These penetrate the meat, enhancing its natural taste without overpowering it. Feel free to experiment with a sprinkle of garlic powder, paprika, or even dried herbs like rosemary or thyme for an added dimension, taking inspiration from classic Mediterranean flavors often paired with crispy skin roast chicken.
- Butter: Unsalted butter is your best friend here. It serves multiple purposes: it helps the seasonings adhere to the skin, promotes beautiful browning, and, most importantly, locks in precious moisture, contributing to that irresistible juicy texture.
- Celery: Don't skip this humble stalk! Stuffing a few celery ribs into the chicken cavity imparts a delicate, earthy aroma and, as it cooks, releases steam that keeps the inside of the bird moist and tender. You might even find yourself nibbling on the cooked, softened celery – a delightful bonus!
- Optional Veggies: For a complete, one-pan meal, consider roasting hearty vegetables alongside your chicken. Potatoes (cut into chunks), carrots, onions, Brussels sprouts, or parsnips absorb the chicken's rendered fat and juices, becoming incredibly flavorful and caramelized. Toss them with a little olive oil, salt, pepper, and perhaps some fresh rosemary or thyme for a truly satisfying side dish.
Step-by-Step Guide to Roasting Your Chicken
Creating a mouth-watering easy roasted chicken is a straightforward process when broken down into simple steps. Follow these instructions for a perfect dinner every time.
- Preheat Your Oven: Start by preheating your oven. Many recipes suggest 350°F (175°C) for a slower, more even cook, while others, aiming for crispy skin roast chicken, opt for a higher temperature like 425°F (220°C). We'll discuss the pros and cons of each in our tips section, but for now, aim for 375°F (190°C) as a versatile starting point.
- Prepare the Chicken: Unpackage your whole chicken and pat it thoroughly dry with paper towels, both inside and out. This step is crucial for achieving crispy skin.
- Seasoning is Key: Rub the chicken generously with softened butter. Then, season the chicken liberally with salt, black pepper, and onion powder. Don't forget to season the cavity! For an extra layer of flavor and moisture, gently lift the skin over the breast and thighs and rub a thin layer of butter directly onto the meat underneath before seasoning.
- Stuff the Cavity: Place a few celery stalks inside the chicken’s cavity. You can also add half an onion, a lemon half, or a few sprigs of fresh herbs for additional aromatic depth.
- Prepare for Roasting: If you have a roasting pan with a rack, use it. The rack elevates the chicken, allowing air to circulate and promoting even cooking and crispier skin. If not, a simple baking sheet with a wire rack placed inside works perfectly. If roasting without a rack, you might want to place the celery directly in the pan to act as a bed for the chicken.
- Tuck the Wings: To prevent the delicate wing tips from burning during the long roasting process, tuck them underneath the chicken. You can also tie the legs together with kitchen twine, though it's not strictly necessary for flavor or cooking.
- Roast to Perfection: Place the chicken in the preheated oven. A 3-pound chicken roasted at 375°F (190°C) will typically cook in about 75-90 minutes. Roasting at 425°F (220°C) will shorten the cooking time to around 50-60 minutes, yielding a very crispy skin.
- Check for Doneness: The chicken is fully cooked when an instant-read thermometer inserted into the thickest part of the thigh (without touching the bone) reads 165°F (74°C). The juices should also run clear, and the meat near the bone should no longer be pink.
- Rest, Rest, Rest!: This is perhaps the most important, often overlooked step for a juicy chicken. Once cooked, remove the chicken from the oven, transfer it to a cutting board, and tent it loosely with foil. Let it rest for at least 10-15 minutes (20 minutes is even better) before carving. This allows the juices to redistribute throughout the meat, ensuring every bite is moist and flavorful. Cutting too soon will cause the juices to simply run out, leaving you with drier meat.
Pro Tips for Roast Chicken Perfection
Elevate your oven roasted chicken from good to truly exceptional with these expert insights:
- Dry Skin is Crispy Skin: As culinary experts like Nicole McLaughlin emphasize, "Dry skin is crispy skin." This cannot be stressed enough. Patting the chicken extremely dry with paper towels removes surface moisture, allowing the skin to crisp up beautifully rather than steam. For an even crispier result, some cooks even let the chicken air-dry in the refrigerator uncovered for a few hours or overnight after patting it dry.
- Season Inside and Out (and Under): Don't just season the surface. Ensure the cavity is seasoned, and for maximum flavor penetration and moisture, gently work butter and seasoning under the skin, especially over the breast meat.
- Choosing Your Roasting Temperature:
- Lower Temp (350-375°F): Results in a more even cook and very tender meat, with good browning over a longer period.
- Higher Temp (400-425°F): Favored for achieving an incredibly crispy skin in a shorter amount of time. Be mindful that the breast meat can dry out more easily at higher temperatures if overcooked. If using a high temp, consider starting high for 15-20 minutes, then reducing to 375°F for the remainder of the cooking time. This initial blast helps render fat and kickstart the browning process.
- Don't Forget the Drippings: The flavorful juices and rendered fat at the bottom of your roasting pan are pure gold! Use them to drizzle over the carved chicken, toss with your roasted vegetables, or even make a quick pan sauce or gravy. These drippings are packed with all the essence of your perfect roasted chicken.
- The Art of Carving: Once rested, carve your chicken against the grain for the most tender slices. Separate the legs and thighs, then carve the breast meat.
- Explore More: For even more in-depth strategies on achieving that coveted crunchy exterior, delve into specific techniques shared in our guide on Crispy Skin Roast Chicken: Expert Tips for a Flavorful Meal. And if you’re looking to truly broaden your repertoire of chicken dishes, consider Mastering Whole Roasted Chicken: From Simple Seasoning to Delicious for advanced tips and variations.
Beyond the Bird: Roasting with Vegetables
One of the ultimate conveniences of a roasted chicken meal is the opportunity to cook your side dishes right alongside the main event. Roasting chicken with vegetables transforms a simple dinner into a hearty, flavorful, one-pan (or multi-rack) feast. As the chicken roasts, its rendered fat and flavorful juices drip down onto the vegetables, infusing them with an unparalleled depth of flavor. Potatoes become delightfully crisp, carrots sweeten, and onions caramelize into tender, savory morsels. Simply chop your chosen hearty vegetables (potatoes, carrots, parsnips, Brussels sprouts, bell peppers) into similar-sized pieces, toss them with a little olive oil, salt, pepper, and your favorite herbs (rosemary and thyme are excellent choices), then arrange them around the chicken in the roasting pan for the last 45-60 minutes of cooking. This not only simplifies cleanup but also creates a harmonious blend of flavors that perfectly complements your succulent bird.
Leftovers: Savoring Every Bit
A generous roasted chicken often means delicious leftovers, which can be just as exciting as the initial meal. Allow any leftover chicken to cool completely before storing it in an airtight container in the refrigerator for up to four days. To reheat, gently warm in the oven (covered to prevent drying) or in the microwave until thoroughly heated through.
Beyond simply reheating, leftover roast chicken is incredibly versatile. Shredded chicken can be transformed into gourmet sandwiches, added to vibrant salads, folded into comforting pot pies, or simmered in a rich chicken noodle soup. Don't forget the carcass! It's the perfect base for making a flavorful homemade chicken stock, ensuring that not a single bit of your delicious meal goes to waste.
With this comprehensive guide, you’re now equipped to create an easy, juicy roasted chicken that will impress family and friends alike. From the simple act of seasoning to the crucial resting period, each step contributes to a dish that is both deeply satisfying and surprisingly straightforward. So, preheat your oven, gather your ingredients, and prepare to enjoy the irresistible aroma and incredible taste of a truly perfect homemade roasted chicken. Happy cooking!
